CODESYS Control in Raspberry Pi
Getting Started with CODESYS Control in Raspberry Pi

Getting Started with CODESYS on the Raspberry Pi 🥧
I wanted to put together a quick blog post that might help folks get started writing CODESYS code on a Raspberry Pi. Once everything is set up, it’s a fantastic platform for practicing your PLC programming skills on a Linux based controller. However, if it’s your first time working with a Raspberry Pi and CODESYS, the initial setup might be a bit confusing.
In this basic example, I’ll walk you through creating a simple ON/OFF switch setup using an LED. When the ON switch is pressed, the LED will light up; pressing the OFF switch will turn it off.
What You’ll Need 📝
To follow along, gather the following components:
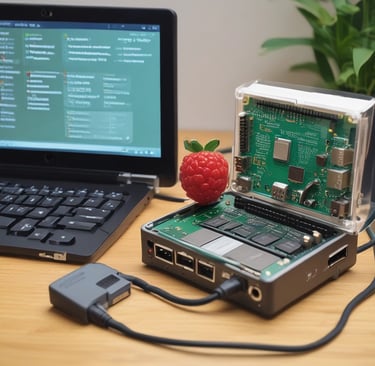
A Raspberry Pi (I’m using a Raspberry Pi 3)
A breadboard
Two tactile-style switches
An LED (color of your choice)
One 220Ω resistor
Jumper wires
(Optional) GPIO extension board
A computer with CODESYS installed
(I used version CODESYS 64 3.5.20.40 at the time of this writing)
Here’s how I mapped the GPIO pins in this project:
Output to LED: GPIO25 (%QX3.1 in CODESYS)
Input for ON switch: GPIO22 (%IX2.6)
Input for OFF switch: GPIO18 (%IX2.2)
Wiring the Circuit
I’ll eventually upload a diagram once I’ve gotten more comfortable with the Fritzing software. But for now, I think this is a simple enough circuit that you can build without one:
LED Output: Connect the 220Ω resistor to GPIO25. Connect the other leg of the resistor to the positive (long) leg of the LED. Then, connect the LED’s negative leg to ground.
Switch Inputs: Connect each GPIO pin to one side of the switches (normally open). Connect the other side of each switch to the 3.3V pin on the Raspberry Pi. You will be using one switch for each input pin.
Setting Up CODESYS with Raspberry Pi
This post focuses on setting up CODESYS to communicate with your Raspberry Pi. I’m assuming that:
Your Raspberry Pi is already set up and connected to your network.
You can ping it and SSH into it.
You’ve already installed CODESYS on your computer.
(Tip: I recommend running CODESYS in a virtual machine if you use other development platforms like Studio5000, as I’ve found they don’t always play well together on the same host.)
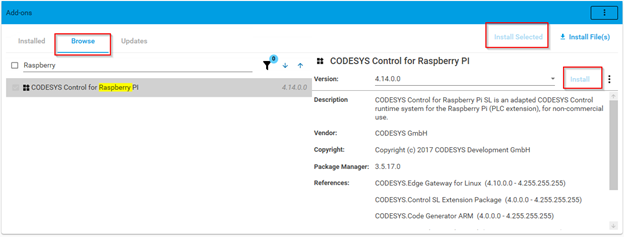
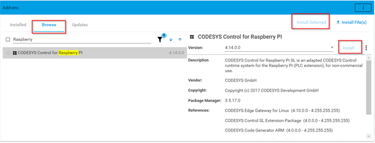
Step 1: Install CODESYS Control for Raspberry Pi
Open the CODESYS Installer and restart it as Administrator.
Browse for "Raspberry Pi", check the appropriate box, and install the package.
(If it's grayed out, it's probably already installed.)


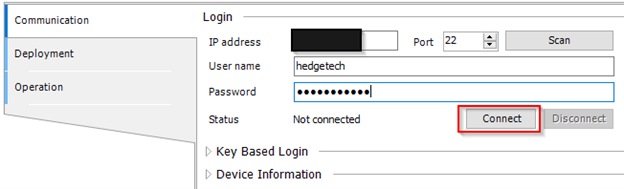
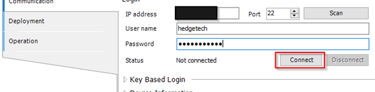
Use your Raspberry Pi’s IP address and SSH credentials to connect.
I recommend keeping the CODESYS IDE closed while installing packages to avoid restarting it afterward.
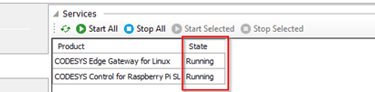
Once installed, go to Tools > Deploy Control SL (it’s at the bottom of the list).
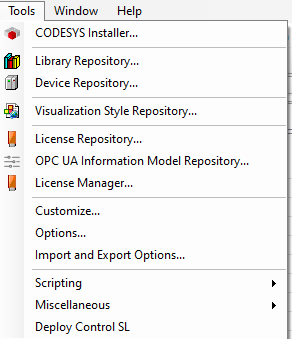

This tool should prompt you to install CODESYS Control for Raspberry Pi SL. If not, go to Deployment, select the product and version, then install.
During the process, you may be asked to install the CODESYS Edge Gateway for Linux. Please be sure to accept that.

Now Comes the Fun Part: Writing the Code 💻
Lately, I’ve been experimenting with creating Function Blocks (FBs) for inputs and outputs. This gives you more flexibility; for example, implementing Hand-Off-Auto (HOA) modes for outputs or enabling fault injection on analog signals.
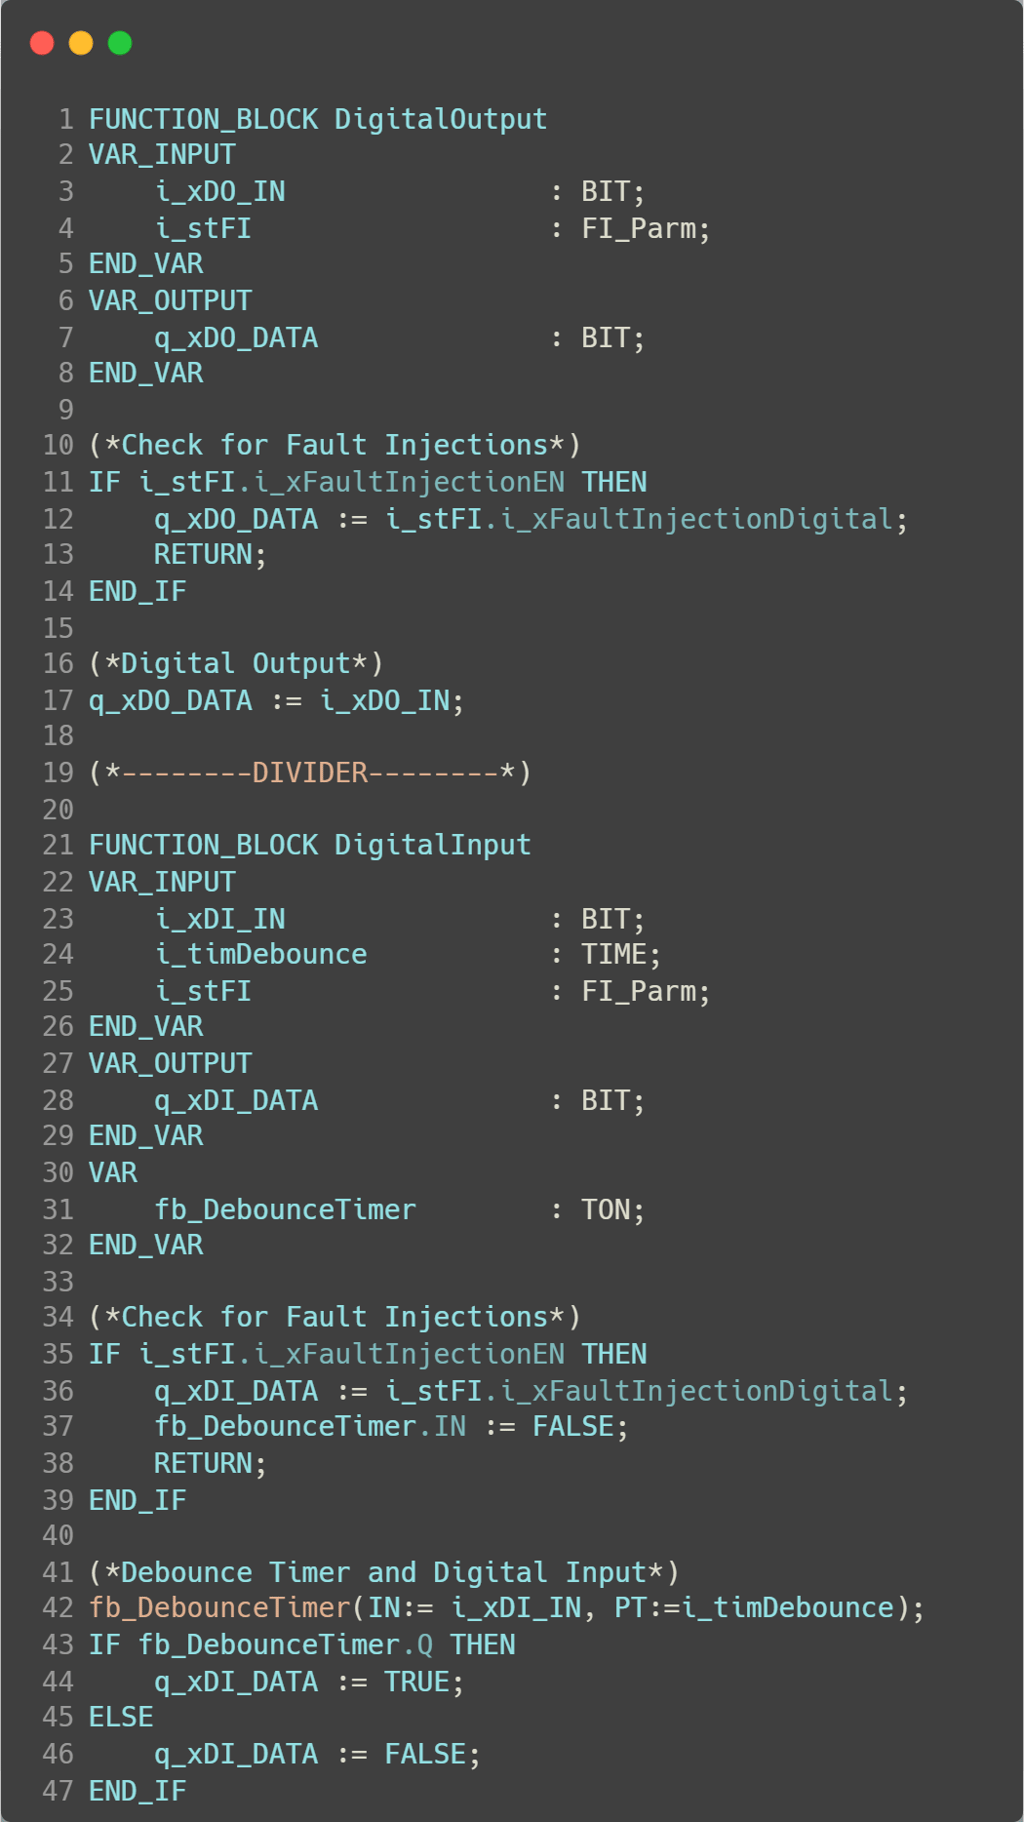
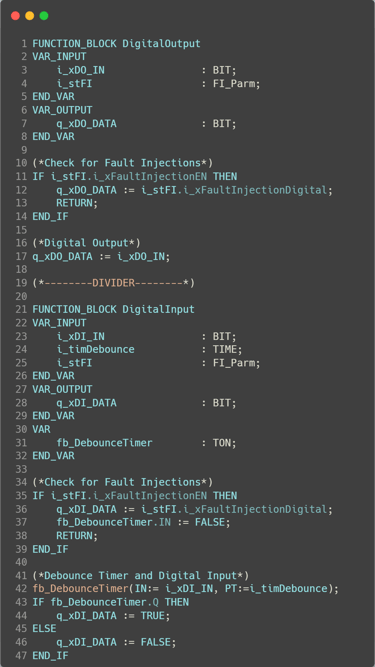
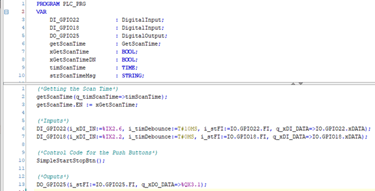
For this example, I created a very basic FB to handle the digital inputs and outputs. Here's a look at the logic:
The FI_Parm variables are custom DUTs I created to simulate fault injection. These are useful during testing or when doing point-to-point verifications during startup or bench testing
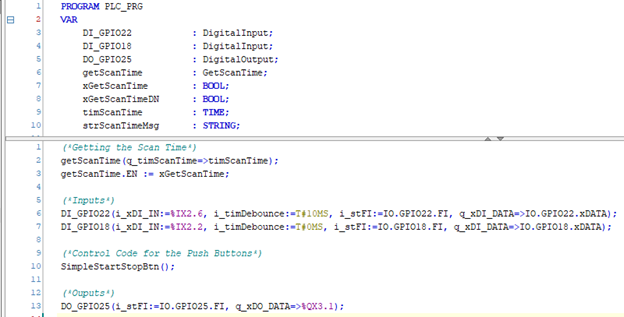
While I often prefer structured text, for something like this, ladder logic can make it visually clearer and easier to understand at a glance

To access GPIOs, navigate to GPIOs_A_B in the CODESYS device tree.
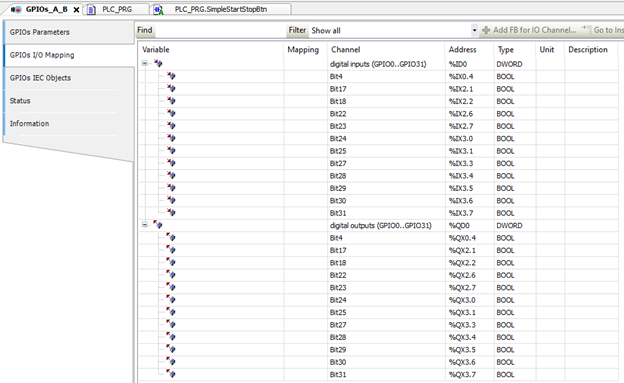
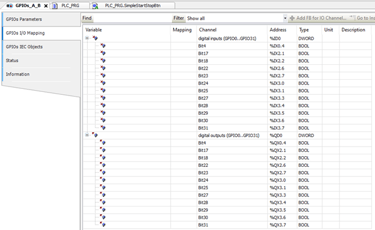
You can directly map variables in your code to these outputs for an easier setup. But as I mentioned, in some of the projects I have worked on in the past it required the flexibility to dynamically map to the outputs or from the inputs, so I just wanted to demonstrate a different approach on this blog.
After all of this you are technically ready to download to the Pi and test out your code.
Downloading to the Raspberry Pi
In the Device Tree, select your device.
You can scan the network for your Raspberry Pi or manually add its IP under Device Options > Manage Favorite Devices.
(I usually prefer adding the IP directly.)If prompted, enter the CODESYS Control password you set on the Raspberry Pi.
During development, I typically choose Login with Download, but I don’t check the “Update boot application” box yet.
Once downloaded, hit the Start button in the top ribbon (the play icon).
That’s it, you’re ready to test your application!
Final Thoughts 💡
If you'd like to see this code in action, check out my Instagram where I post reels on some of the personal projects or code I am developing.
I hope this post was helpful! If you’d like to see more tutorials like this, maybe a guide on setting up a static IP address for your Pi or more advanced examples using Function Blocks, feel free to reach out.
To access a parts list of some of the components I am using in my projects please visit my Amazon Affiliate links.
Thank you so much for your support, and happy coding!